Author: admin

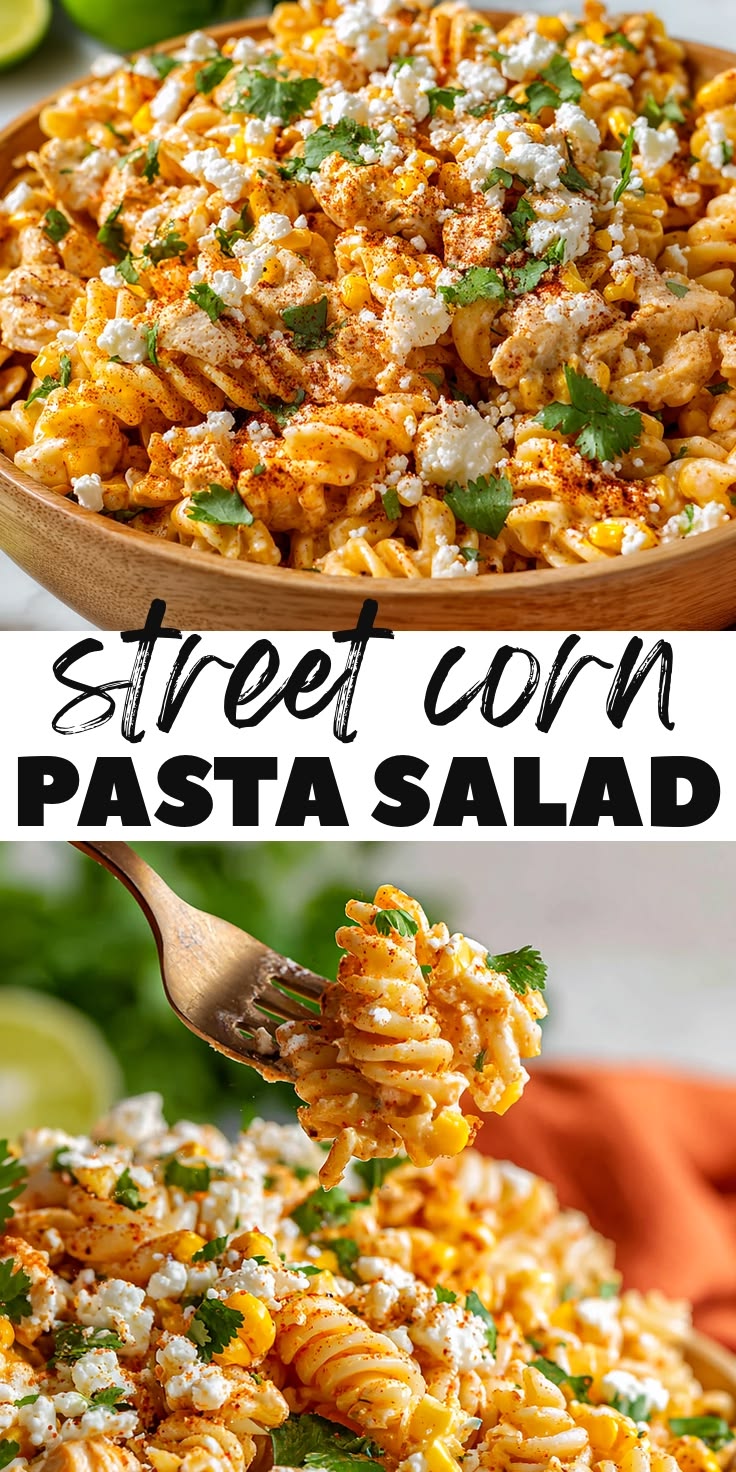
  • Summer Pasta Salad

    Summer Pasta Salad

    Introduction

    Do you ever need something cold, light, and filling that doesn’t keep you stuck in a hot kitchen for long? A chilled bowl of comfort can really save a busy day when everyone is hungry and time is short. This summer pasta salad is one of those easy dishes I turn to when I want something fresh but still satisfying for the whole family. It comes together with simple pantry ingredients and fresh vegetables, and I usually make it ahead so it tastes even better later. It works beautifully for quick lunches, evening meals, or relaxed gatherings at home.

    Why You Will Love This Recipe

    Are you looking for a meal that feels light but still keeps you full for hours? This dish brings together soft pasta, crisp vegetables, and a simple dressing that feels refreshing in every bite. The best part is how flexible it is, so you can adjust it based on what you already have in your kitchen. This summer pasta salad is budget-friendly, easy to store, and great for busy weeks when cooking from scratch every day feels tiring. It also works well for leftovers, so nothing goes to waste. You can make it ahead, chill it, and enjoy it whenever you need a quick, cold meal.

    Ingredients

    Do you want the best texture in your pasta salad? Choose short pasta like fusilli or penne because it holds dressing better.

    • 300g pasta (fusilli or penne)
    • 1 cup cherry tomatoes, halved
    • 1 cucumber, diced
    • 1/2 red onion, finely sliced
    • 1/2 cup black olives, sliced
    • 1/2 cup sweet corn
    • 150g feta cheese, crumbled
    • 3 tbsp olive oil
    • 2 tbsp lemon juice
    • Salt and black pepper to taste

    For 2 people, simply reduce everything by half. For more than 4 people, double the ingredients while keeping dressing slightly less than double so it does not become too heavy.

    Instructions

    Step 1: Preparation

    Are you unsure how to start without making a mess in the kitchen? Boil water in a large pot, add salt, and cook pasta until tender but firm. Drain and let it cool completely so it does not turn mushy later.

    Step 2: Main Cooking Process

    Do you worry about overcooking pasta for cold dishes? Keep the texture slightly firm because it will soften a little later. Once drained, spread it on a tray so it cools faster. For smaller servings, reduce boiling time slightly.

    Step 3: Combining Ingredients

    Are you wondering when to mix everything for best flavor? Add cooled pasta into a large bowl, then gently toss in vegetables, olives, and corn. For larger batches, mix in stages so everything coats evenly without breaking the pasta pieces.

    Step 4: Finishing & Final Simmer

    Do you want the dressing to blend perfectly without overpowering the salad? Whisk olive oil, lemon juice, salt, and pepper, then pour over the mixture. Toss lightly and chill for 20–30 minutes so flavors settle beautifully before serving.

    Why This Recipe Works for Busy Days

    Are you trying to plan meals ahead without daily cooking stress? This summer pasta salad stays fresh for hours and even tastes better after resting. It is perfect for meal prep, quick lunches, or light dinners when time is limited. You can store it easily and enjoy it straight from the fridge.

    Tips & Tricks

    • Are you worried about sticky pasta after boiling? Rinse it lightly with cold water to stop cooking instantly and prevent clumps. Avoid over-rinsing though, as it removes flavor. For small or large batches, cooling time stays the same, but larger portions should be spread wider for faster cooling.
    • Do you want your salad to stay fresh longer? Always dry vegetables properly before mixing. Extra water can dilute the taste. When making smaller portions, reduce watery vegetables slightly to keep balance strong. For larger groups, add dressing gradually to avoid sogginess.
    • Are you unsure how much dressing is enough? Start with less and add more after tasting. Pasta absorbs liquid over time. For 2 people, use a lighter hand with dressing, and for bigger servings, mix in stages so flavor stays even.
    • Do you want better flavor the next day? Let the salad rest in the fridge for at least 30 minutes before serving. For meal prep, keep dressing separate if storing longer than a day to maintain freshness and texture.

    Variations

    • Do you want a protein-packed version for a fuller meal? Add grilled chicken or shredded rotisserie chicken. It turns this summer pasta salad into a complete dinner. For small servings, add less meat; for larger groups, mix protein separately before combining.
    • Are you looking for a vegetarian-friendly option? Skip meat and add chickpeas or boiled eggs instead. This keeps it filling without changing the light texture. Adjust quantities based on servings so the balance of pasta and toppings stays consistent.
    • Do you want a simple ingredient swap? Replace feta with mozzarella cubes or cottage cheese for a milder taste. This works well when cooking for kids or guests with softer flavor preferences. Scaling up still keeps the same creamy balance.
    • Are you craving extra freshness and aroma? Add basil, parsley, or dill for a bright herb boost. Fresh herbs lift the flavor instantly. Use a light hand for small portions and increase slightly when preparing larger bowls.

    Serving Suggestions

    • Do you want a light lunch idea that still feels complete? Serve this summer pasta salad with toasted bread or garlic slices. It makes a simple yet filling meal for small families. For larger groups, pair with extra sides to stretch portions easily.
    • Are you planning a casual family dinner? Pair it with grilled vegetables or baked potatoes for a comforting plate. This keeps the meal balanced without heavy cooking. Adjust serving size by adding more salad instead of extra mains.
    • Do you need something for gatherings or picnics? Serve chilled in a large bowl with fresh herbs on top for a colorful look. It travels well and stays fresh. Simply double the recipe for bigger crowds without changing flavor.
    • Are you thinking about a light side dish? Use it alongside fish or roasted chicken for a refreshing contrast. It complements heavier dishes nicely. For small servings, reduce portion size but keep flavors the same.

    Storage Instructions

    • Do you want to keep leftovers fresh for later? Store in an airtight container in the fridge for up to 3 days. For smaller portions, divide into single boxes for easy grab-and-go meals. Larger batches should be stored in shallow containers for even cooling.
    • Are you wondering if you can reheat it? This dish is best enjoyed cold, so reheating is not needed. If it feels dry, add a splash of olive oil before serving. For bigger portions, refresh each serving individually instead of reheating the whole batch.
    • Do you plan to freeze it for later use? Freezing is not recommended because vegetables lose texture. Pasta may also become soft. For large batches, it is better to store only for a few days in the fridge instead.
    • Are you trying to prep ahead for busy days? You can cook pasta and chop vegetables a day before, then mix when ready. Keep dressing separate for longer storage. This helps maintain freshness whether you are cooking for 2 or 8 people.

    Recipe Timing

    Do you need a quick overview before starting this summer pasta salad? Prep takes about 15 minutes, cooking pasta takes 10 minutes, and resting adds 20–30 minutes. Total time is roughly 45 minutes from start to serving.

    Nutrition Information (Approximate)

    Do you want a rough idea of what you are eating? One serving of this summer pasta salad contains about 320–420 calories, with 10–15g protein depending on added ingredients. It also provides fiber, healthy fats, and vitamins from fresh vegetables. These values are estimates and may change based on portion size and ingredient choices.

    FAQs

    Are you wondering if this salad can be made ahead of time?
    Yes, it can be prepared a day before. Just store it in the fridge and mix gently before serving for best taste.

    Do you worry about the pasta becoming too soft?
    Cook it slightly firm and cool it quickly. This keeps texture better even after mixing with dressing.

    Can you replace ingredients easily?
    Yes, you can swap vegetables or cheese based on what you have. It stays flexible and still tastes good.

    What if the salad feels dry after chilling?
    Add a small drizzle of olive oil or lemon juice and mix lightly to refresh it.

    How long can it stay in the fridge?
    It stays fresh for up to 3 days when stored properly in an airtight container.

    Can you adjust the flavor easily?
    Yes, just add more lemon, herbs, or salt gradually until it tastes right for you.

    Conclusion

    Are you looking for a simple dish you can rely on during warm days or busy evenings? This summer pasta salad is the kind of recipe that fits into real life without stress. You can change ingredients, adjust portions, and still end up with something fresh and satisfying every time. It works for small family dinners or larger gatherings without much effort. Once you try it, it often becomes one of those go-to mals you keep coming back to again and again.

    Recipe Card

    Summer Pasta Salad

    Recipe by admin
    Servings

    4

    servings
    Prep time

    15

    minutes
    Cooking time

    10

    minutes
    Calories

    320–420

    kcal

    A fresh, light pasta salad made with simple ingredients and a zesty dressing. Perfect for warm days, meal prep, or quick family meals.

    Ingredients

    • 300g pasta (fusilli or penne)

    • 1 cup cherry tomatoes, halved

    • 1 cucumber, diced

    • 1/2 red onion, sliced

    • 1/2 cup black olives

    • 1/2 cup sweet corn

    • 150g feta cheese

    • 3 tbsp olive oil

    • 2 tbsp lemon juice

    • Salt and black pepper

    • For 2 people, use half the ingredients. For more than 4 people, double everything and slightly reduce dressing.

    Directions

    • Cook pasta in salted water until firm, then drain and cool completely.
    • Prepare vegetables by chopping and slicing into small, even pieces.
    • Mix pasta, vegetables, olives, corn, and feta in a large bowl.
    • Whisk dressing, pour over salad, and toss gently. Chill before serving.
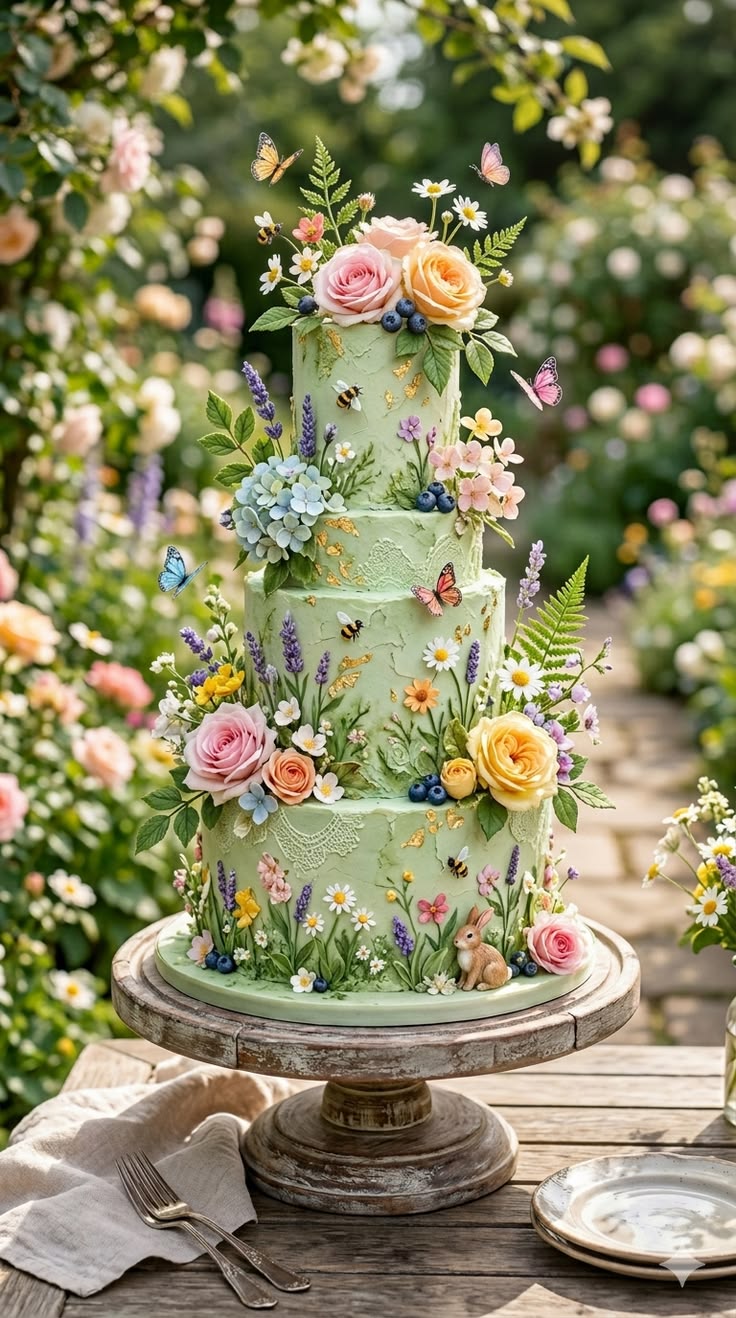
  • Spring Cake Ideas

    Spring Cake Ideas

    Introduction (90–120 words)

    Are you looking for a light dessert that feels fresh after every meal? Spring cakes often bring that soft, airy comfort people crave when the weather starts to warm up. These spring cake ideas are all about simple flavors, gentle sweetness, and a homemade feel that doesn’t take much effort. I like making them when I want something easy that still feels special for family time or quiet evenings at home. You don’t need fancy tools or complicated steps, just a few basic ingredients and a soft touch in the kitchen. This style of cake fits perfectly into everyday life without feeling heavy or overwhelming.

    Why You Will Love This Recipe (120–150 words)

    Are you tired of heavy desserts that feel too rich for warmer days? This cake keeps things light, soft, and refreshing while still giving you that cozy homemade feeling everyone loves. These spring cake ideas work beautifully for busy weekdays, relaxed weekends, or even small gatherings where you want something sweet but not too filling. The texture stays fluffy, and the flavor feels gentle enough to pair with tea, fruit, or even a light cream topping. It also stores well, so leftovers don’t go to waste. You can easily adjust the ingredients for two people or scale it up for a larger family without changing the comfort it brings. It’s the kind of recipe you’ll want to save for later again and again.

    Ingredients

    Are you unsure which ingredients give a cake that soft spring texture? Using fresh eggs and room-temperature butter makes the biggest difference for a light, fluffy result.

    • 2 cups all-purpose flour (for 2 people: use 1 cup; for more than 4: increase evenly)
    • 1 cup sugar
    • 1/2 cup unsalted butter (softened)
    • 2 large eggs
    • 3/4 cup milk
    • 1 tablespoon lemon zest
    • 2 teaspoons baking powder
    • 1 teaspoon vanilla extract
    • A pinch of salt

    Instructions

    Step 1: Preparation (40 words)

    Are you wondering how to start without making a mess? Preheat your oven to 180°C and grease a medium baking pan. Mix flour, baking powder, and salt in one bowl so everything spreads evenly. If cooking for fewer people, use a smaller pan.

    Step 2: Main Cooking Process (40 words)

    Are you unsure how to get that soft cake texture? Beat butter and sugar until smooth and creamy, then add eggs one by one. The mixture should look light and fluffy. For larger batches, mix longer but keep the same texture.

    Step 3: Combining Ingredients (40 words)

    Are you worried about lumps in your batter? Slowly add dry ingredients and milk into the butter mixture. Stir gently until smooth. Add vanilla and lemon zest for freshness. For smaller portions, mix lightly to avoid overworking the batter.

    Step 4: Finishing & Final Simmer (40 words)

    Are you unsure when the cake is fully baked? Pour batter into the pan and bake for 25–30 minutes until golden and a toothpick comes out clean. Let it cool slightly before slicing. Adjust baking time slightly for smaller or larger cakes.

    Why This Recipe Works for Busy Days (60–80 words)

    Are you short on time but still want homemade dessert? This cake fits perfectly into busy routines because it uses simple steps and basic pantry ingredients. You can prepare the batter quickly and bake it while doing other tasks. These spring cake ideas also store well, so you can enjoy slices over a few days without extra effort. It’s practical for meal planning or unexpected guests.

    Tips & Tricks

    • Are you not getting a fluffy texture? Always make sure butter is soft but not melted, because this helps trap air while mixing. If cooking for fewer people, reduce mixing time slightly; for larger batches, mix in stages to keep consistency light and even throughout.
    • Are you worried about dry cake? Do not overbake. Check a few minutes early because ovens vary. For smaller cakes, reduce time by 5–7 minutes; for bigger portions, increase slowly while checking texture so it stays soft and moist inside.
    • Are you unsure about flavor balance? Lemon zest adds freshness but don’t overuse it or it may become bitter. For small servings, use a light touch; for large cakes, spread zest evenly so every slice has balanced flavor.
    • Are you struggling with even baking? Always preheat the oven fully before placing the cake inside. For larger quantities, rotate the pan halfway through baking. For smaller batches, place it in the center rack for even heat distribution.

    Variations

    • Are you craving a richer version? You can turn this into a buttery almond cake by adding 1/2 cup crushed almonds and a few drops of almond extract. It keeps the same soft base but adds a deeper, nutty flavor that works well for both small and large servings.
    • Are you looking for a lighter option? Replace butter with yogurt for a softer, tangy cake. It reduces richness while keeping moisture. This works great when cooking for fewer people since it feels lighter but still satisfying for a small dessert portion.
    • Are you missing an ingredient? You can swap milk with oat milk or almond milk without changing texture too much. This keeps the cake soft and suitable for different dietary needs while still fitting all spring cake ideas variations.
    • Are you wanting stronger aroma? Add fresh herbs like rosemary or lavender in very small amounts. It gives a floral twist that feels perfect for spring. Just adjust lightly for smaller cakes so flavor doesn’t overpower the soft base.

    Serving Suggestions

    • Are you planning a family dessert table? Serve slices with fresh strawberries or seasonal fruit on the side. It feels light and refreshing, and you can easily double or halve portions depending on how many guests you have.
    • Are you enjoying a quiet tea break? Pair a warm slice with green tea or chamomile. The soft texture blends beautifully with warm drinks, making it perfect for a single serving or a small cozy afternoon snack.
    • Are you hosting guests casually? Add a light whipped cream topping and serve on a simple platter. It looks elegant without effort, and scaling up works well for larger groups without changing the recipe structure.
    • Are you preparing for kids or gatherings? Cut into small cubes and serve as finger cake bites. This makes it easy for sharing and works well whether you’re serving 2 people or a bigger crowd.

    Storage Instructions

    • Are you wondering how long it stays fresh in the fridge? Store the cake in an airtight container for up to 3–4 days. Smaller portions should be wrapped individually to keep moisture, while larger cakes should be sliced before storing for easier use.
    • Are you unsure how to reheat it? Warm slices in the microwave for 10–15 seconds. This brings back softness without drying it out. For larger batches, reheat only what you need to keep the rest fresh longer.
    • Are you thinking about freezing it? Wrap slices tightly in plastic wrap and freeze for up to 2 months. Smaller portions freeze faster and thaw easily, while larger cakes should be sliced first for better storage control.
    • Are you planning ahead for baking? You can prepare the batter a few hours before baking and store it in the fridge. Just bring it back to room temperature before baking for even texture, especially when scaling for more people.

    Recipe Timing (30–40 words)

    Prep Time: 15 minutes
    Cook Time: 30 minutes
    Rest Time: 10 minutes
    Total Time: 55 minutes

    Nutrition Information (Approximate) (50–70 words)

    Are you curious about what each slice contains? One serving has approximately 260–300 calories, 4–6g protein, and moderate carbohydrates. It also provides small amounts of calcium and healthy fats from butter and milk. These values are estimates and may vary depending on exact ingredients, portion sizes, and any substitutions used while preparing these spring cake ideas.

    FAQs

    Are you wondering if this cake can be made ahead of time? Yes, you can bake it a day earlier and store it in the fridge. It stays soft and fresh when covered properly.

    Are you worried about a common baking mistake? Overmixing the batter can make the cake dense instead of fluffy. Mix gently just until combined.

    Are you missing an ingredient? You can replace milk with yogurt or plant-based milk without changing the texture too much.

    Are you facing a dry texture issue? It usually happens from overbaking. Check the cake a few minutes early next time.

    Are you unsure how to store leftovers? Keep them in an airtight container in the fridge for up to 3–4 days.

    Are you wanting to adjust sweetness? Simply reduce or increase sugar slightly based on your taste without affecting structure.

    Conclusion (90–110 words)

    Are you looking for a simple dessert you can return to again and again? This soft and light cake brings comfort without needing complicated steps or special tools. These spring cake ideas are flexible enough for quiet family evenings, small celebrations, or even casual tea moments at home. You can easily adjust ingredients for fewer people or scale them up for guests without losing texture or flavor. What makes it special is how naturally it fits into everyday cooking. Once you try it, it becomes one of those easy recipes you keep coming back to whenever you want something gentle and homemade.

    Recipe Card

    Spring Cake Ideas

    Recipe by admin
    Servings

    4

    servings
    Prep time

    15

    minutes
    Cooking time

    30

    minutes
    Calories

    260–300

    kcal

    A light and fluffy homemade spring cake with soft vanilla-lemon flavor. Easy to make, perfect for family desserts or cozy tea moments. Simple ingredients, gentle sweetness, and flexible serving size for everyday baking.

    Ingredients

    • 2 cups all-purpose flour

    • 1 cup sugar

    • 1/2 cup unsalted butter (softened)

    • 2 large eggs

    • 3/4 cup milk

    • 1 tablespoon lemon zest

    • 2 teaspoons baking powder

    • 1 teaspoon vanilla extract

    • Pinch of salt

    • (For 2 people: use half ingredients. For more than 4: increase evenly.)

    Directions

    • Preheat oven to 180°C and grease a baking pan. Mix flour, baking powder, and salt.
    • Beat butter and sugar until fluffy, then add eggs one by one.
    • Add dry mix and milk slowly, then mix in vanilla and lemon zest.
    • Pour into pan and bake 25–30 minutes until golden and set. Let cool before serving.

  • Dumplings Squishy

    Dumplings Squishy

    Introduction

    Are you craving something soft, warm, and comforting that feels like a hug in a bowl? Dumplings Squishy is exactly that kind of cozy food people love making on slow evenings or when the weather turns cold. These dumplings turn out pillowy, tender, and lightly chewy, making every bite feel satisfying without being heavy. I usually make them when I want something quick but still homemade and comforting for the family table. This Dumplings Squishy recipe is simple enough for beginners and flexible enough for busy weeknights, giving you a dish that feels special without extra effort.

    Why You Will Love This Recipe

    Looking for a comforting meal that doesn’t require complicated steps or fancy ingredients? This Dumplings Squishy recipe brings everything together in one cozy bowl with soft textures and simple flavors that feel familiar and comforting. It’s budget-friendly, easy to prepare, and works beautifully for both quick dinners and relaxed weekend cooking. The dumplings stay soft even after reheating, making them perfect for meal prep or leftovers the next day. You can easily adjust the portion if you’re cooking for 2 people or scale it up for more than 4 without changing the taste or texture. Whether you’re feeding family or just want something soothing after a long day, this dish is the kind you’ll want to save and repeat.

    Ingredients

    Want your dumplings to turn out soft instead of dense? The key is using fresh flour and gentle mixing without overworking the dough.

    • 2 cups all-purpose flour (reduce to 1 cup for 2 people or increase to 3–4 cups for larger servings)
    • 1 teaspoon baking powder
    • ½ teaspoon salt
    • ¾ cup warm water (adjust slightly as needed)
    • 1 tablespoon oil or melted butter
    • 1 cup chopped vegetables (carrots, peas, or cabbage)
    • 1 small onion, finely chopped
    • 2 cloves garlic, minced
    • 1½ cups broth or light sauce base
    • Black pepper to taste

    Instructions

    Step 1: Preparation

    Are you unsure how to start the dough without making it tough? Mix flour, baking powder, and salt in a bowl, then slowly add warm water and oil. Stir gently until a soft dough forms. Let it rest for 10 minutes while you prepare filling.

    Step 2: Main Cooking Process

    Wondering how to build flavor for your dumplings? Heat a pan, sauté onion, garlic, and vegetables until slightly soft and fragrant. Add a little salt and pepper. For smaller portions, simply reduce vegetable quantity while keeping seasoning balanced.

    Step 3: Combining Ingredients

    Not sure how to shape dumplings properly? Take small dough portions and flatten gently, then add a bit of filling inside. Close carefully without pressing too hard. Drop them into warm broth so they cook evenly and stay soft.

    Step 4: Finishing & Final Simmer

    Are you worried about overcooking dumplings? Let them simmer gently in broth for 10–12 minutes until they puff slightly and become soft. Avoid high heat so they stay squishy and tender. Adjust simmer time slightly for smaller or larger batches.

    Why This Recipe Works for Busy Days

    Need a meal that doesn’t demand constant attention? This recipe fits perfectly into busy schedules because everything cooks in one pot with minimal prep. The dumplings can be shaped ahead of time and stored for later use. Leftovers reheat easily, making it a practical choice for work lunches or next-day dinners without losing texture or flavor.

    Tips & Tricks

    • Are your dumplings turning out too dense or heavy? Always avoid over-kneading the dough, as it makes them tough instead of soft. For smaller servings, mix gently and reduce flour proportion carefully. For larger groups, prepare dough in batches to keep texture consistent without overworking it.
    • Do your dumplings sometimes break while cooking? Make sure you seal the edges properly without pressing too thin. A gentle fold works best. If cooking for fewer people, handle smaller portions carefully to maintain shape and avoid tearing during simmering.
    • Want more flavor in every bite? Always season both dough and filling lightly instead of relying on sauce alone. If scaling up, increase seasoning gradually so the taste stays balanced across all portions.
    • Are you unsure about cooking time? Always simmer on low heat to keep Dumplings Squishy soft. High heat can make them fall apart. Adjust timing slightly depending on batch size, but always check texture instead of only watching the clock.

    Variations

    • Want a meatier version for stronger flavor? Add minced chicken or beef to the filling with onions and spices. This keeps the Dumplings Squishy texture soft while making it more filling for family dinners. You can easily double the meat when cooking for more than 4 people.
    • Looking for a vegetarian option that still feels hearty? Replace meat with mushrooms, spinach, and grated carrots. This keeps the dumplings light yet flavorful. The recipe scales well, so you can easily reduce for 2 people or increase for gatherings.
    • Want to switch ingredients based on what’s in your kitchen? Try using whole wheat flour instead of white flour for a slightly denser texture. It still keeps the squishy feel but adds a rustic taste that works well for everyday meals.
    • Want more aroma and depth in flavor? Add fresh herbs like dill, parsley, or coriander into the filling. This simple change enhances Dumplings Squishy without changing the cooking process, and it works for both small and large servings.

    Serving Suggestions

    • Looking for a cozy bowl-style meal idea? Serve dumplings in warm broth with fresh herbs on top. This works perfectly for small family dinners or can be doubled easily for gatherings, keeping everything light and comforting.
    • Want something more filling for lunch or dinner? Pair dumplings with steamed rice or mashed potatoes. The combination makes the meal heartier and easy to stretch for more than 4 people without extra effort.
    • Need a simple side to balance flavors? Add a fresh cucumber salad or lightly seasoned greens. It keeps the plate refreshing and works well whether you’re serving 2 people or a full table.
    • Want a comforting presentation for guests? Serve Dumplings Squishy in deep bowls with a drizzle of butter or light sauce on top. It feels warm, homemade, and easy to scale for any group size.

    Storage Instructions

    • Wondering how long you can keep leftovers fresh? Store dumplings in an airtight container in the fridge for up to 3 days. Keep broth separate if possible to maintain texture. This works well for both small and large batches without losing softness.
    • Not sure how to reheat without making them dry? Warm gently on low heat with a splash of water or broth. Avoid microwaving for too long, as it can make Dumplings Squishy lose its soft texture. Reheat only the portion you need.
    • Want to freeze them for later meals? Freeze uncooked dumplings on a tray first, then transfer to a bag. Cook directly from frozen when needed. This is great for meal prep and works for both 2-person and family-size portions.
    • Planning ahead for busy days? You can prepare dough and filling separately a day before. Keep them chilled and assemble fresh when ready to cook. This saves time while keeping the final texture soft and fresh.

    Recipe Timing

    Prep Time: 20 minutes
    Cook Time: 25 minutes
    Rest Time: 10 minutes
    Total Time: 55 minutes

    Nutrition Information (Approximate)

    Each serving of Dumplings Squishy contains around 280–350 calories, depending on filling and portion size. It provides moderate carbohydrates, small amounts of protein, and dietary fiber from vegetables. Values may vary based on ingredient choices and serving size adjustments.

    FAQs

    Can I prepare Dumplings Squishy ahead of time?
    Yes, you can prepare the dough and filling a few hours before cooking. Keep them covered in the fridge and assemble when ready to cook for best softness.

    What is the most common mistake when making dumplings?
    Over-kneading the dough is the biggest mistake. It makes dumplings dense instead of soft and squishy. Mix gently and stop once the dough comes together.

    Can I replace all-purpose flour with another type?
    Yes, you can use whole wheat flour or a mix of both. Just adjust water slightly to keep the dough soft and easy to shape.

    Why are my dumplings not soft enough?
    If Dumplings Squishy turns out firm, the heat may be too high or dough overworked. Always simmer gently and avoid heavy handling of the dough.

    How should I store leftover dumplings safely?
    Store in a sealed container in the fridge and consume within 3 days. Keep broth separate if possible to maintain texture and freshness.

    Can I make the flavor stronger?
    Yes, increase herbs, garlic, or spices in the filling. Taste before cooking so the seasoning stays balanced even after simmering.

    Conclusion

    Are you looking for a comforting dish you can make again and again without stress? Dumplings Squishy brings simple ingredients together in a soft, satisfying way that fits both busy nights and relaxed cooking days. The best part is how easy it is to adjust the portions, whether you’re cooking for yourself, two people, or a full family table. You can also change fillings and flavors without losing that cozy texture everyone enjoys. This Dumplings Squishy recipe is one of those dishes that quietly becomes a favorite because it feels homemade, warm, and always dependable whenever you need something comforting.

    Recipe Card

    Dumplings Squishy

    Recipe by admin
    Servings

    4

    servings
    Prep time

    20

    minutes
    Cooking time

    25

    minutes
    Calories

    280–350

    kcal

    Soft, pillowy dumplings cooked in a light broth with simple vegetables. A cozy, homemade dish perfect for family dinners or comforting meals any day of the week.

    Ingredients

    • 2 cups all-purpose flour (adjust for 2 or 4+ servings)

    • ½ teaspoon salt

    • ¾ cup warm water

    • 1 tablespoon oil or melted butter

    • 1 cup mixed vegetables (carrots, peas, cabbage)

    • 1 small onion, chopped

    • 2 garlic cloves, minced

    • 1½ cups broth

    • Black pepper to taste

    Directions

    • Mix flour, baking powder, and salt. Add warm water and oil to form soft dough. Rest for 10 minutes.
    • Sauté onion, garlic, and vegetables until slightly soft and fragrant. Season lightly.
    • Shape small dumplings, fill gently, and seal edges carefully.
  • Healthy Spring Meals

    Healthy Spring Meals

    Looking for lighter meals that still feel comforting when the weather starts changing?
    Spring often brings that mix of warm afternoons and cool evenings, and that’s exactly when I start craving simple food that feels fresh but still filling. These healthy spring meals are the kind I turn to when I don’t want anything heavy but still want something cozy on the table. I usually turn a few seasonal vegetables, grains, and herbs into one easy bowl that works for lunch or dinner. It’s the kind of cooking that feels relaxed, not rushed, and fits perfectly into everyday life.

    Why You Will Love This Recipe

    Trying to find a meal that feels light but still keeps everyone satisfied?
    These healthy spring meals are all about balance. They bring fresh vegetables, soft grains, and simple flavors together in a way that feels natural and easy. Nothing is complicated, and you don’t need special skills to make it work. It’s the kind of recipe that fits busy weekdays but still feels special enough for a slow weekend lunch.

    Want something you can easily save and reuse throughout the week?
    What makes these healthy spring meals so useful is how flexible they are. You can swap ingredients based on what’s in your kitchen, and leftovers taste even better the next day. It’s budget-friendly, meal-prep friendly, and works for both small and bigger families. For 2 people, simply cut everything in half. For more than 4, just double the ingredients without changing the cooking style.

    Ingredients

    Choosing fresh, crisp vegetables makes all the difference in spring dishes.

    • 1 cup quinoa (dry)
    • 2 medium carrots, chopped
    • 1 zucchini, sliced
    • 1 cup baby spinach
    • 1/2 cup green peas
    • 2 tablespoons olive oil
    • 2 cloves garlic, minced
    • 1 tablespoon lemon juice
    • Salt and black pepper to taste
    • 1 teaspoon dried oregano

    For 2 people, reduce everything by half. For more than 4, increase ingredients proportionally while keeping seasoning slightly adjustable.

    Instructions

    Step 1: Preparation
    Have you ever started cooking and realized everything feels unorganized? Rinse quinoa well and chop all vegetables before cooking. This makes the process smooth. If cooking for 2, prep smaller portions; for larger groups, keep vegetables pre-cut in advance.

    Step 2: Main Cooking Process (40 words)
    Wondering how to build flavor without heavy sauces? Cook quinoa in water until fluffy. In a pan, heat olive oil and lightly sauté garlic until fragrant. Add carrots first since they take longer. For bigger servings, use a wider pan for even cooking.

    Step 3: Combining Ingredients
    Not sure when everything should come together? Add zucchini, peas, and spinach into the pan and gently mix with cooked quinoa. Let everything warm together so flavors blend naturally. For smaller portions, reduce heat slightly to avoid overcooking vegetables.

    Step 4: Finishing & Final Simmer
    Want a fresh taste that feels complete? Add lemon juice, salt, pepper, and oregano at the end. Stir gently and let it sit for a minute. For larger batches, taste and adjust seasoning slowly to keep flavor balanced throughout.

    Why This Recipe Works for Busy Days

    Struggling to cook something healthy when time is short?
    These healthy spring meals are perfect for busy days because everything cooks in one pan and one pot. You can prepare ingredients ahead of time and finish cooking in under 30 minutes. It also stores well, so lunch for the next day is already sorted without extra effort.

    Tips & Tricks

    • Want your vegetables to stay fresh and not soggy?
      Always add harder vegetables like carrots first and softer ones like spinach at the end. This keeps texture balanced. If cooking for fewer people, reduce heat slightly so small portions don’t overcook too fast.
    • Ever had bland quinoa before?
      Cook quinoa in lightly salted water or vegetable broth for better flavor. Don’t skip the resting time after cooking. For larger servings, stir gently so grains don’t break or become mushy in the pot.
    • Trying to save time on weekdays?
      Chop vegetables the night before and store them in the fridge. This makes cooking faster. For 2 people, store smaller portions separately so freshness is maintained longer without waste.
    • Want stronger flavor without extra calories?
      Add fresh herbs like parsley or basil right before serving. They lift the dish naturally. If scaling up for more people, increase herbs slightly instead of extra salt for a lighter, fresher taste.

    Variations

    • Meaty Version
      Want more protein in your bowl? Add grilled chicken or turkey strips cooked separately and mixed at the end. It blends well with the vegetables without changing the light feel of healthy spring meals. For smaller servings, use just one small breast piece and adjust seasoning lightly.
    • Vegetarian Option
      Looking for a fully plant-based version? Stick to the original recipe and add chickpeas for extra protein. They make the dish more filling without changing the texture. For larger groups, simply increase chickpeas instead of adding extra grains.
    • Ingredient Swap
      Don’t have zucchini or peas at home? Try broccoli, green beans, or bell peppers instead. The recipe stays flexible and still works well as healthy spring meals. For 2 people, use only one or two vegetable types for simplicity.
    • Flavor Boost Variation
      Want a stronger taste profile? Add a pinch of cumin or smoked paprika while sautéing garlic. It gives a deeper aroma without making the dish heavy. For bigger portions, increase spices slightly but taste as you go.

    Serving Suggestions

    • Light Lunch Bowl
      Wondering how to enjoy this as a quick lunch? Serve it warm in a bowl with a drizzle of olive oil and fresh herbs. It feels light but filling. For smaller portions, pack it in a lunch box, or for more people, serve buffet-style.
    • Family Dinner Plate
      Need something that works for everyone at dinner? Pair these healthy spring meals with roasted potatoes or baked bread. It makes a complete table meal. For larger families, double sides while keeping the main dish balanced.
    • Fresh Side Dish Idea
      Looking for a side to grilled protein? Serve it cold or warm next to fish or chicken. The freshness balances heavier mains. Adjust portion sizes depending on how many proteins you’re serving alongside.
    • Picnic Style Serving
      Planning an outdoor meal? Pack it chilled with lemon wedges on the side. It holds texture well and tastes refreshing. For groups, store in separate containers for easy sharing without mess.

    Storage Instructions

    • Fridge Storage
      Want to keep leftovers fresh for the next day? Store in an airtight container for up to 3 days. Divide into smaller portions if cooking for more people so it cools evenly and stays fresh longer.
    • Reheating
      Not sure how to warm it without drying it out? Reheat on low heat with a splash of water or olive oil. Stir gently so vegetables stay soft but not overcooked. Smaller portions heat faster, so watch closely.
    • Freezing
      Can you freeze healthy spring meals? Yes, but freeze without fresh herbs for best taste. Store in freezer-safe containers for up to 1 month. For large batches, freeze in individual portions for easy thawing.
    • Make-Ahead Tips
      Want to prep meals for the week? Cook quinoa and chop vegetables ahead, then store separately. Combine when ready to cook. This works well for both small and large servings without losing freshness.

    Recipe Timing

    Looking for a quick overview before you start cooking?
    Prep Time: 15 minutes
    Cook Time: 20 minutes
    Rest Time: 5 minutes
    Total Time: 40 minutes

    Nutrition Information (Approximate)

    Curious about how light this meal really is?
    Each serving of these healthy spring meals contains approximately 280–350 calories, with 8–12g protein depending on variations. It also provides fiber, vitamins A and C, and healthy fats from olive oil. Values are estimates and may change based on ingredients and portion sizes used.

    FAQs

    Can I make this ahead of time?
    Yes, you can prepare it a day before and store it in the fridge. It tastes even better after flavors settle.

    What is the most common mistake?
    Overcooking vegetables is the most common issue. Add softer vegetables at the end to keep texture fresh.

    Can I replace quinoa with something else?
    Yes, couscous, rice, or bulgur work well as substitutes depending on what you prefer or have available.

    Why is my dish too dry?
    Add a small splash of olive oil or lemon juice while mixing. It helps bring moisture back naturally.

    How long does it stay fresh in the fridge?
    It stays good for about 3 days if stored properly in a sealed container.

    Can I change the flavor easily?
    Yes, you can adjust herbs and spices like basil, thyme, or paprika to match your taste.

    Conclusion

    Looking for a simple meal you can keep coming back to all season long?
    These healthy spring meals are designed to fit real life—easy to cook, easy to store, and easy to adjust depending on your needs. Whether you’re cooking for two or preparing for a full family table, it stays flexible without losing flavor. You can change vegetables, adjust portions, or add your own twist anytime. It’s the kind of recipe that quietly becomes part of your weekly routine, especially when you want something fresh without overthinking dinner.

    Recipe Card

    Healthy Spring Meals

    Recipe by admin
    Servings

    4

    servings
    Prep time

    15

    minutes
    Cooking time

    20

    minutes
    Calories

    280–350

    kcal

    A light, fresh, and comforting bowl made with seasonal vegetables, quinoa, and simple seasoning. Perfect for busy days or relaxed family meals.

    Ingredients

    • 1 cup quinoa (dry)

    • 2 medium carrots, chopped

    • 1 zucchini, sliced

    • 1 cup baby spinach

    • 1/2 cup peas

    • 2 tbsp olive oil

    • 2 cloves garlic, minced

    • 1 tbsp lemon juice

    • Salt & pepper to taste

    • 1 tsp oregano

    • For 2 people, use half quantities. For more than 4, increase evenly and adjust seasoning gradually.

    Directions

    • Rinse quinoa and chop all vegetables.
    • Cook quinoa until fluffy and set aside.
    • Sauté garlic, then add carrots, zucchini, peas, and spinach.
    • Mix quinoa with vegetables, season with lemon, salt, pepper, and oregano.
    • Stir gently and serve warm.

  • Glitter Dumpling

    Glitter Dumpling

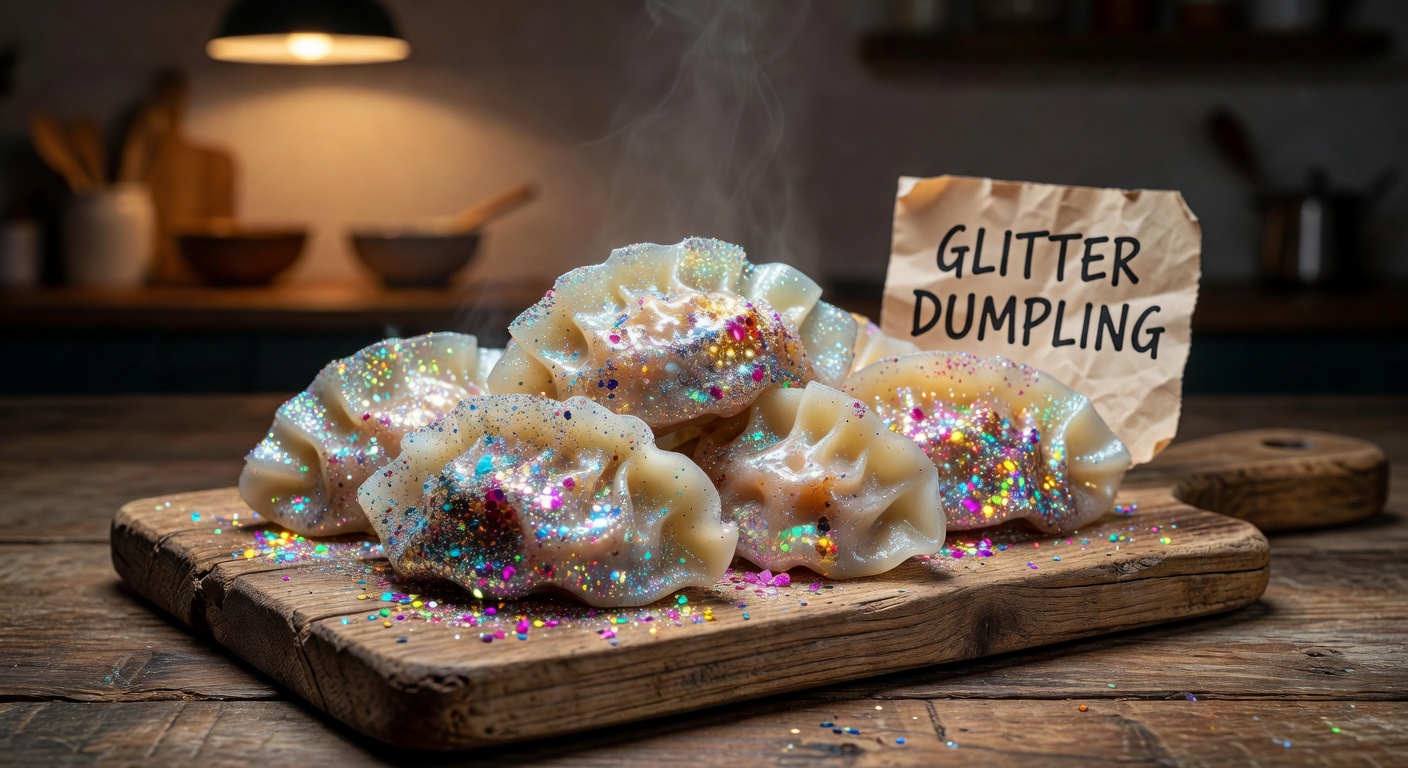
    Ever wondered how to turn simple dumplings into something a little magical for dinner? Glitter dumpling is a fun, eye-catching twist on classic dumplings, with a soft filling and a light shimmer on the outside that makes them feel extra special. I like making these when evenings feel a bit dull or when I want something cozy but playful on the table. They’re easy enough for busy nights and still feel like a treat for family meals. The texture is soft, slightly chewy, and comforting, while the sparkle makes them perfect for sharing or saving for later inspiration.

    Why You Will Love This Recipe

    Looking for something cozy but not boring for dinner? This recipe brings comfort and a bit of joy together in one plate. The glitter dumpling idea is simple, but it feels creative and fresh, especially when you want to impress without extra effort. It’s weeknight-friendly, doesn’t need fancy tools, and works well even if you’re cooking after a long day.

    Want something budget-friendly that still feels special? These dumplings use basic ingredients you probably already have, and you can easily adjust the filling based on what’s in your kitchen. They freeze well, reheat nicely, and taste just as good the next day. Whether you’re cooking for family or just saving meals ahead, this recipe fits right into real life.

    Ingredients

    Choosing fresh dumpling wrappers makes a big difference, as they hold the filling better and stay soft after cooking.

    • 20 dumpling wrappers (for 4 people; use 10 for 2 people, or double for more)
    • 250g minced chicken or vegetables
    • 2 tablespoons finely chopped spring onions
    • 1 teaspoon garlic paste
    • 1 teaspoon ginger paste
    • 1 tablespoon soy sauce
    • 1 teaspoon sesame oil
    • 1 tablespoon edible shimmer powder (food-safe)
    • 1 tablespoon oil for cooking
    • ½ teaspoon salt
    • ½ teaspoon black pepper

    Instructions

    Step 1: Preparation – 40 words
    Trying to keep dumplings from breaking while filling them? Mix the minced chicken or vegetables with garlic, ginger, soy sauce, salt, pepper, and spring onions until soft and sticky. If cooking for 2, simply halve everything; for more people, double the mixture evenly.

    Step 2: Main Cooking Process – 40 words
    Worried about uneven dumpling shapes? Place a small spoon of filling in each wrapper, fold gently, and seal edges with a little water. Keep sizes even so they cook at the same time, especially if adjusting quantities for smaller or larger batches.

    Step 3: Combining Ingredients – 40 words
    Not sure when to add the shimmer? Lightly brush each dumpling with a bit of oil, then dust with edible shimmer powder before cooking. This helps it stick nicely. For fewer dumplings, use less powder; for more, increase gently without overcoating.

    Step 4: Finishing & Final Simmer – 40 words
    Struggling to get soft yet slightly crisp dumplings? Heat oil in a pan, place dumplings, cook until the base is golden, then add a splash of water and cover. Let them steam until soft. Cooking time stays similar, even if you scale portions.

    Why This Recipe Works for Busy Days

    Need something quick but still homemade? These dumplings come together fast and don’t require complicated steps. You can prep the filling ahead and assemble later, which saves time during busy evenings. They also store well, so you can make a batch and cook whenever needed, making life a little easier.

    Tips & Tricks

    • Finding your dumplings too dry or tough? Always keep wrappers covered with a damp cloth while working so they don’t dry out. If making for 2 people, you’ll handle fewer wrappers, but for larger batches, this step becomes even more important to maintain softness.
    • Worried about filling leaking out? Avoid overfilling each wrapper, as it can break during cooking. Use a small spoon for control. When scaling up for more than 4 people, keep portions consistent instead of adding extra filling to each dumpling.
    • Not getting that light shimmer effect? Apply shimmer powder lightly after oiling the surface. Too much can look heavy instead of soft and pretty. For smaller portions, reduce the amount slightly so it stays balanced and visually appealing.
    • Ending up with uneven cooking? Keep dumplings similar in size so they cook evenly in the pan. If cooking a larger batch, work in smaller rounds instead of overcrowding the pan, which helps maintain texture and flavor.

    Variations

    • Meaty Version
      Want a richer taste? Swap minced chicken with beef or lamb for a deeper flavor. Add a bit more seasoning to match the stronger meat. If cooking for just 2 people, reduce the meat accordingly, or double it for larger gatherings without changing the cooking method.
    • Vegetarian Option
      Looking for a meat-free version? Use finely chopped mushrooms, cabbage, and carrots instead of meat. The texture stays soft and juicy. For smaller servings, cut the vegetables in half, and for bigger portions, simply increase everything evenly.
    • Ingredient Swap
      Missing dumpling wrappers? You can use thin flatbread cut into circles as a quick substitute. The texture will be slightly different but still comforting. Adjust the number of pieces depending on how many people you’re serving without changing the filling ratio.
    • Flavor Boost
      Want a stronger aroma? Add fresh herbs like cilantro or a pinch of chili flakes for a mild kick. These small changes make the dish feel new each time. Adjust the amount based on portion size so the flavor doesn’t overpower the dumplings.

    Serving Suggestions

    • With Light Soup
      Thinking of a cozy meal idea? Serve these dumplings with a simple clear soup on the side. It balances the richness and makes the meal feel complete. For smaller servings, pair with a small bowl of soup, or for larger groups, prepare a bigger pot to share.
    • As a Snack Plate
      Need something fun for evening cravings? Arrange the dumplings on a plate with a dipping sauce like soy or chili. This works well for casual gatherings. You can easily adjust the number of dumplings depending on how many people are joining.
    • Family Dinner Style
      Want a comforting dinner setup? Serve dumplings alongside rice or noodles for a fuller meal. This stretches the dish further if you’re feeding more than 4 people, or keeps it light if you’re cooking for just 2.
    • Party Platter Idea
      Planning a small get-together? Place glitter dumplings on a large tray for a playful look. They make a great conversation starter. Increase the batch size and cook in rounds so everything stays fresh and warm for guests.

    Storage Instructions

    • Fridge Storage
      Worried about leftovers going bad? Store cooked dumplings in an airtight container in the fridge for up to 2 days. If you made a smaller batch for 2 people, use a compact container; for larger batches, divide into portions so they stay fresh longer.
    • Reheating
      Not sure how to reheat without drying them out? Warm dumplings in a pan with a splash of water and cover to steam lightly. This keeps them soft. Whether reheating a few or many, avoid microwaving too long as it can make them chewy.
    • Freezing
      Want to save some for later? Freeze uncooked dumplings on a tray first, then transfer to a bag. This prevents sticking. For small portions, freeze in small batches; for larger meal prep, label bags clearly for easy use later.
    • Make-Ahead Tips
      Short on time during the week? Prepare the filling and shape dumplings ahead of time, then store them in the fridge for a few hours before cooking. This works well whether you’re cooking for 2 or prepping a larger family meal.

    Recipe Timing

    Prep Time: 20 minutes
    Cook Time: 15 minutes
    Rest Time: Not needed
    Total Time: 35 minutes

    Nutrition Information (Approximate)

    Curious about what’s in each serving? Each portion contains around 250–320 calories, with 12–18g protein depending on the filling used. It also provides small amounts of iron and healthy fats. These values are estimates and can change based on ingredients and portion sizes.

    FAQs

    Can I make these ahead of time?
    Yes, you can prepare and shape them a few hours earlier and cook when needed.

    Why are my dumplings breaking?
    This usually happens if they are overfilled or not sealed properly.

    Can I skip shimmer powder?
    Yes, it’s optional and only for appearance. The taste stays the same.

    Why are my dumplings too dry?
    They may be overcooked or not steamed enough during cooking.

    How do I store leftovers?
    Keep them in the fridge for up to 2 days in a sealed container.

    Can I adjust the flavor?
    Yes, add more herbs or spices depending on your taste and portion size.

    Conclusion

    Looking for a simple way to make dinner feel a bit more special? Glitter dumpling is one of those recipes that brings comfort and creativity together without extra effort. You can keep it simple, adjust the filling, or play with flavors depending on what you have at home. It works for quiet evenings, family meals, or even small gatherings. Once you try it, you’ll likely come back to it again and again, just changing little things each time. It’s easy, flexible, and always satisfying in its own cozy way.

    Recipe Card

    Glitter Dumpling

    Recipe by admin
    Servings

    4

    servings
    Prep time

    20

    minutes
    Cooking time

    15

    minutes
    Calories

    250–320

    kcal

    Soft, flavorful dumplings with a light shimmer on top. Easy to make, cozy to eat, and perfect for everyday meals or small gatherings.

    Ingredients

    • 20 dumpling wrappers (use 10 for 2 people, double for more)

    • 250g minced chicken or vegetables

    • 2 tablespoons chopped spring onions

    • 1 teaspoon garlic paste

    • 1 teaspoon ginger paste

    • 1 tablespoon soy sauce

    • 1 teaspoon sesame oil

    • 1 tablespoon edible shimmer powder

    • 1 tablespoon oil

    • ½ teaspoon salt

    • ½ teaspoon black pepper

    Directions

    • Mix chicken or vegetables with garlic, ginger, soy sauce, salt, pepper, and spring onions until combined.
    • Place a small spoon of filling in each wrapper, fold, and seal edges with water.
    • Lightly brush dumplings with oil and dust with shimmer powder.
    • Heat oil in a pan, cook dumplings until golden at the bottom, add a little water, cover, and steam until soft.
      Adjust quantities easily by halving for 2 people or doubling for more servings.


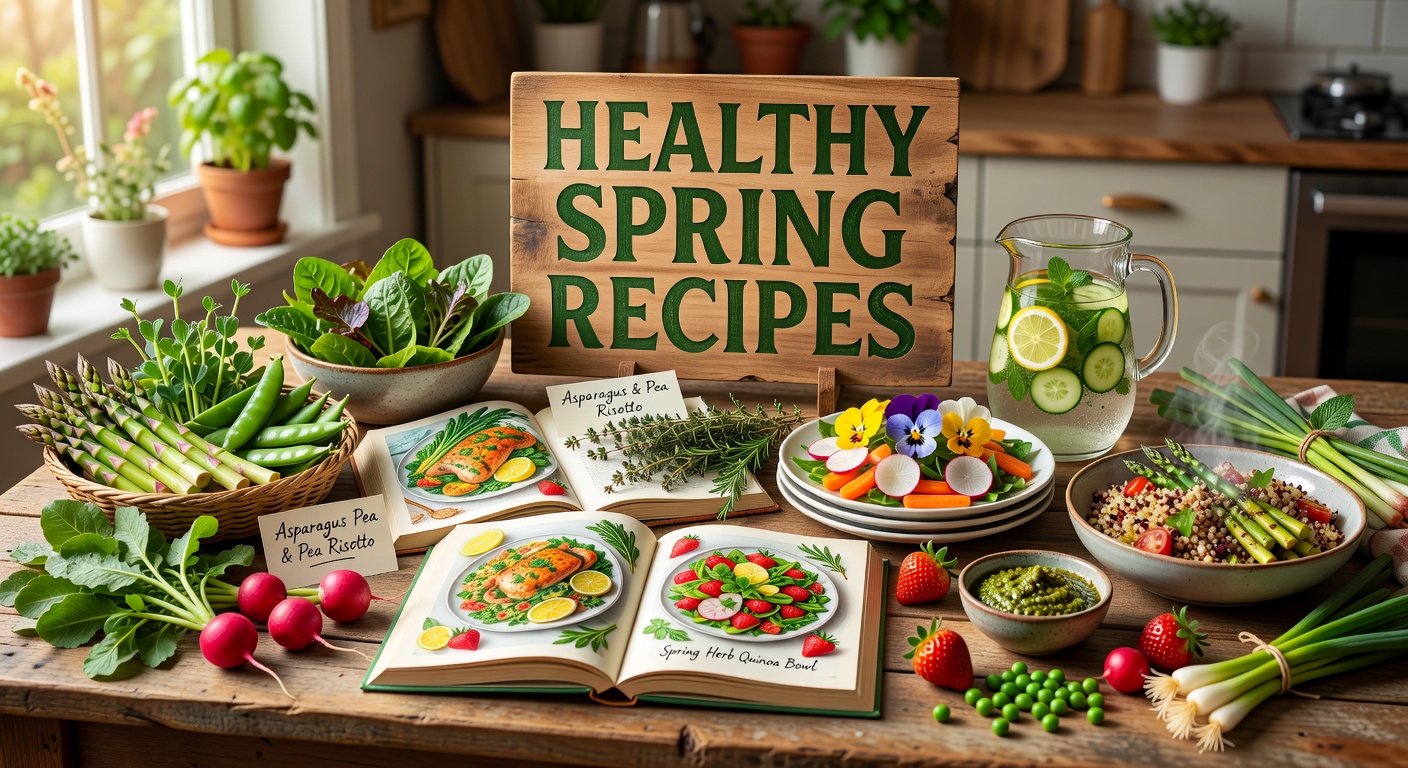
  • Healthy Spring Recipes

    Healthy Spring Recipes

    Introduction

    Ever feel stuck choosing light but satisfying meals when the weather starts to warm up? Healthy spring recipes are all about fresh flavors, simple cooking, and meals that don’t weigh you down. This bright vegetable and herb skillet is one of those dishes I keep coming back to when evenings feel busy but I still want something wholesome. It’s quick, colorful, and fits perfectly into everyday life—whether you’re cooking for family or just trying to eat a little cleaner. I usually make it when I want something comforting but still fresh, especially after a long day when heavy food just doesn’t sound right.

    Why You Will Love This Recipe

    Tired of meals that feel either too heavy or not filling enough? This dish strikes a cozy balance—it’s light yet satisfying, and packed with simple, real ingredients that come together without stress. Healthy spring recipes like this one are perfect for weeknights because they don’t ask much from you, but still deliver great flavor.

    You’ll love how flexible it is—you can use what you already have, adjust portions easily, and even save leftovers for the next day. It’s also budget-friendly, which makes it easy to repeat throughout the week. Whether you’re cooking for two or feeding a small group, this recipe fits right in and feels like something you’ll want to pin and come back to again.

    Ingredients

    Wondering which vegetables taste best in spring cooking? Go for fresh, firm vegetables with bright color for the best flavor.

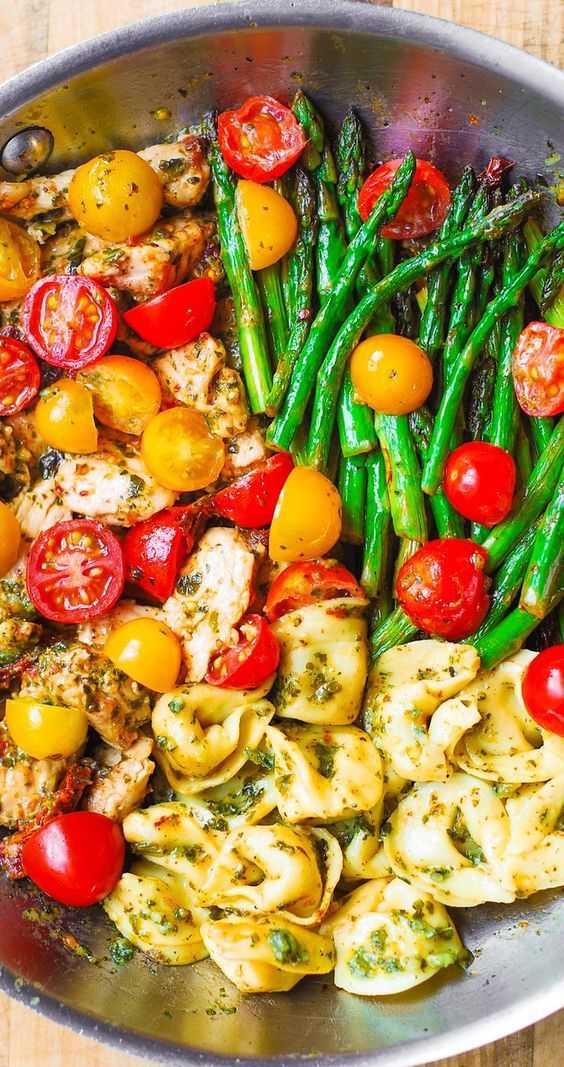
    • 2 cups fresh asparagus, chopped
    • 1 cup cherry tomatoes, halved
    • 1 zucchini, sliced
    • 1 cup baby spinach
    • 1 small red onion, sliced
    • 2 cloves garlic, minced
    • 2 tablespoons olive oil
    • 1 teaspoon lemon zest
    • 2 tablespoons lemon juice
    • 1 teaspoon salt
    • ½ teaspoon black pepper
    • ½ teaspoon dried oregano
    • ¼ cup fresh parsley, chopped

    For 2 people: simply use half of each ingredient.
    For more than 4 people: double or increase ingredients as needed while keeping seasoning balanced.

    Instructions

    Step 1: Preparation
    Feeling unsure about prep time on busy evenings? Start by washing and chopping all vegetables into similar-sized pieces so they cook evenly. Keep everything ready before turning on the stove—this makes the cooking process smoother, especially if you’re adjusting for smaller or larger portions.

    Step 2: Main Cooking Process
    Worried about overcooking vegetables? Heat olive oil in a large pan over medium heat, then add onion and garlic. Cook until soft and fragrant. Add asparagus and zucchini, stirring gently until they begin to soften but still hold their shape.

    Step 3: Combining Ingredients
    Not sure when to add softer vegetables? Toss in cherry tomatoes and spinach next. Stir gently until the spinach wilts and tomatoes release a little juice. If cooking for 2, this step will be slightly quicker due to smaller quantity.

    Step 4: Finishing & Final Simmer
    Want that fresh, spring flavor to really stand out? Add lemon zest, juice, salt, pepper, and oregano. Let everything cook together for a couple of minutes until the flavors blend. Finish with fresh parsley before serving warm.

    Why This Recipe Works for Busy Days

    Struggling to cook something healthy when time feels tight? This recipe comes together in one pan and doesn’t require complicated steps. You can prep vegetables ahead of time or even cook a larger batch to use the next day. It’s the kind of meal you save for later because it fits real life.

    Tips & Tricks

    • Ever notice vegetables turning too soft too quickly? Keep the heat medium and avoid overcrowding the pan. If making a bigger batch for more than 4 people, cook in two rounds to keep that slight crisp texture instead of steaming everything.
    • Finding your dish too bland sometimes? Don’t skip lemon zest—it adds brightness without extra effort. When cooking for 2, reduce seasoning slightly at first, then adjust after tasting to avoid overpowering flavors.
    • Struggling with uneven cooking? Cut vegetables in similar sizes so they cook at the same pace. If doubling the recipe, give firmer vegetables like asparagus a head start before adding softer ones.
    • Wondering how to keep leftovers fresh? Avoid overcooking in the first place. Slightly crisp vegetables hold up better when stored and reheated, especially if you plan to scale up for meal prep.

    Variations

    Meaty Version
    Need something a bit more filling? Add cooked chicken strips or shrimp to the skillet. Stir them in during the final step so they stay tender. If cooking for 2, use a small portion of protein; for larger servings, increase evenly without overpowering the vegetables.

    Vegetarian Option
    Looking for extra plant-based protein? Toss in chickpeas or white beans. They blend nicely with the flavors and make the dish more satisfying. Adjust the quantity depending on how many people you’re serving, keeping the balance of vegetables intact.

    Ingredient Swap
    Don’t have asparagus on hand? Try green beans or broccoli instead. Spring recipes are flexible, so use what’s fresh or available. When cooking for fewer people, stick to fewer vegetables to avoid waste, and expand variety when feeding more.

    Flavor Boost
    Want a stronger flavor profile? Add fresh basil or a sprinkle of grated cheese before serving. Herbs can change the whole feel of the dish. For larger portions, increase herbs gradually so the flavor stays balanced and not overwhelming.

    Serving Suggestions

    • With Warm Bread
      Thinking about a simple meal setup? Serve this with warm crusty bread to soak up the juices. It makes the dish feel more filling without extra effort. For smaller servings, use just a slice or two; for larger groups, add a full bread basket.
    • Over Rice or Quinoa
      Want to stretch the meal further? Spoon the vegetables over rice or quinoa. This works great if you’re feeding more than four people and need something hearty but still light.
    • Alongside Grilled Protein
      Need a balanced dinner? Pair with grilled chicken or fish for a complete meal. If cooking for 2, keep portions small; for bigger gatherings, prepare extra protein alongside the vegetables.
    • As a Light Lunch Bowl
      Looking for a next-day idea? Pack leftovers into a lunch bowl. Add a squeeze of lemon before eating to freshen it up. This works well whether you made a small or large batch.

    Storage Instructions

    • Fridge Storage
      Wondering how long it stays fresh? Store leftovers in an airtight container in the fridge for up to 3 days. Smaller portions cool faster, while larger batches should be spread out before storing to keep texture intact.
    • Reheating
      Concerned about soggy vegetables? Reheat gently in a pan over low heat instead of using a microwave. For small portions, this takes just a few minutes; larger portions may need a bit more stirring.
    • Freezing
      Thinking about freezing extras? While possible, the texture may soften after thawing. If freezing, do it in small portions for easier reheating later.
    • Make-Ahead Tips
      Trying to save time during the week? Chop vegetables ahead and store them separately. This works especially well if you plan to cook different portion sizes across a few days.

    Recipe Timing

    Prep Time: 10 minutes
    Cook Time: 15 minutes
    Rest Time: Not needed
    Total Time: 25 minutes

    Nutrition Information (Approximate)

    Wondering if this fits into your daily meals? Each serving contains around 180–220 calories and 4–6g protein. It also provides fiber and vitamin C from fresh vegetables. These values are estimates and may vary depending on ingredient choices and portion sizes.

    FAQs

    Can I make this ahead of time?
    Yes, you can prep vegetables in advance or cook fully and store for up to 3 days.

    Why are my vegetables too soft?
    You may be overcooking or using high heat too long. Cook just until tender.

    Can I replace asparagus?
    Yes, green beans or broccoli work well in the same quantity.

    How do I keep it from being watery?
    Avoid overcrowding the pan and cook on medium heat.

    Can I store small portions separately?
    Yes, storing in small containers helps with quick reheating.

    How can I boost flavor easily?
    Add extra lemon juice or fresh herbs just before serving.

    Conclusion

    Looking for something fresh but still comforting at the same time? Healthy spring recipes like this one make everyday cooking feel simple and enjoyable. You can adjust it based on what you have, scale it up or down easily, and still end up with something that feels homemade and satisfying. It’s the kind of recipe that fits into real life—busy days, quiet evenings, or quick meal prep. Once you try it, you’ll likely find yourself coming back to it whenever you want something light, warm, and full of fresh flavor.

    Recipe Card

    Healthy Spring Recipes

    Recipe by admin
    Servings

    4

    servings
    Prep time

    10

    minutes
    Cooking time

    15

    minutes
    Calories

    180–220

    kcal

    A light and fresh one-pan meal packed with spring vegetables and simple flavors. Perfect for quick dinners or easy meal prep.

    Ingredients

    • 2 cups asparagus, chopped

    • 1 cup cherry tomatoes, halved

    • 1 zucchini, sliced

    • 1 cup spinach

    • 1 small red onion, sliced

    • 2 cloves garlic, minced

    • 2 cloves garlic, minced

    • 1 tsp lemon zest

    • 2 tbsp lemon juice

    • 1 tsp salt

    • ½ tsp black pepper

    • ½ tsp oregano

    • ¼ cup parsley

    • For 2 people: use half of each ingredient.

    • For more than 4: double ingredients as needed.

    Directions

    • Wash and chop all vegetables into similar sizes.
    • Heat olive oil in a pan, cook onion and garlic until soft.
    • Add asparagus and zucchini, cook until slightly tender.
    • Add tomatoes and spinach, cook until spinach wilts.
    • Stir in lemon zest, juice, and seasonings.
    • Cook for 2–3 more minutes, then finish with parsley.
  • Hello world!

    Welcome to WordPress. This is your first post. Edit or delete it, then start writing!